This screen is used to change the text that appears on any control, table heading, menu or dialogue used within GRS.
How the Language Set works
GRS uses a default Language Set which is provided in the system. If only one Language Set is required then users should edit the default Language Set. An Organisation may decide to have more than one Language Set in which case a new Language Set should be created using the default set to copy from. Note that whilst a Language Set can be edited, new items cannot be added.
Selecting Language Sets
Where there is more than one Language Set available, users can select the Language Set they require for their workstation.

The user will need the appropriate permissions to access the Language Set menu. To do this set a Special Permission for a role in the System Security screen. Once the user has this permission they will see a Combo Box on the Centre toolbar in GRS. They can select a Language Set and at the message select to save it as their default.
This function would be useful in a Multi National Organisation where one person is using English on screen and another using French on screen, but both are sharing the same data.
Creating a new Language Set
If a new Language Set is required, users should create a copy of the default Language Set and then apply changes to the new Language Set.
1. Click on the Tools option on the main menu and then select Language Set from the sub menu.
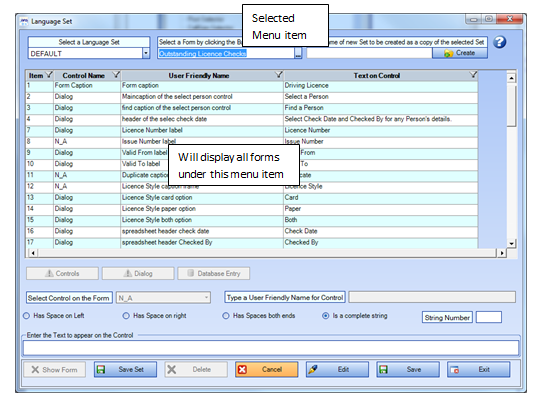
2. When the screen opens it will display the following screen. All instances of Language Sets can be accessed in the drop down box on the left hand side. Select the Default Language Set to be used as a template and on the right hand side enter a name for the new Language Set and click Create.

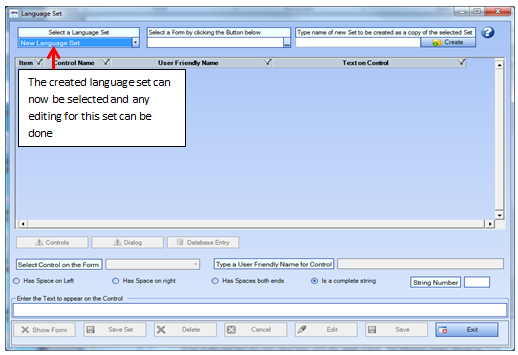
3. At the message click OK. The created Language Set can now be selected and any editing for this set can be done. See Editing the Language Set.
If Language Sets have been changed whilst using this screen a dialogue will appear to set the chosen Language Set as your personal Default on the workstation when using GRS system.
Editing the Language Set
If only one Language Set is required then users should edit the default Language Set.
1. Click on the Tools option on the main menu and then select Language Set from the sub menu.
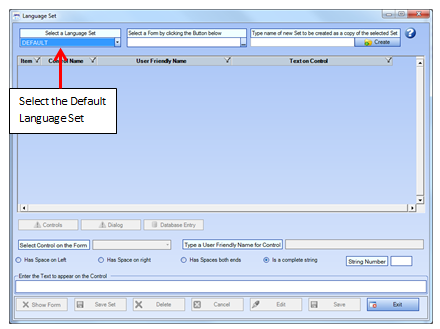
2. When the screen opens it will display the following screen. All instances of Language Sets can be accessed in the drop down box on the left hand side. Select the Default Language Set.
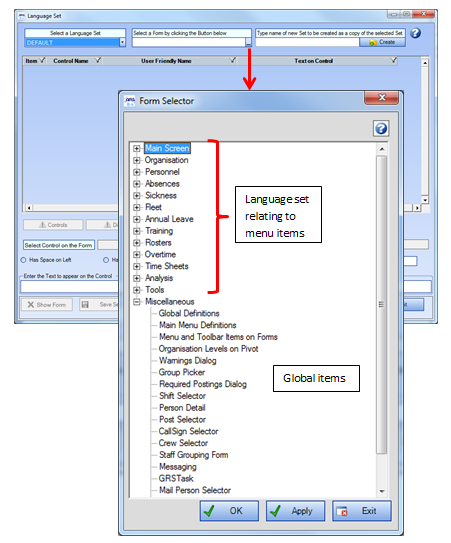
3. All the screens (forms) that appear in GRS have their own subset of Language Set items and one defined subset of Global items. A Global item comprises of the common entries used in captions such as Save, Ok, Exit, Cancel buttons which appear on a number of forms. Changing an item in the Global set will change the value for every form which contains it. The miscellaneous section contains all screens which do not belong to a particular menu item. Select the menu or global item that requires re-naming and click OK.
4. The table will load with all forms that are found within the selected menu item. On this screen decide which items on the form requires re-naming.
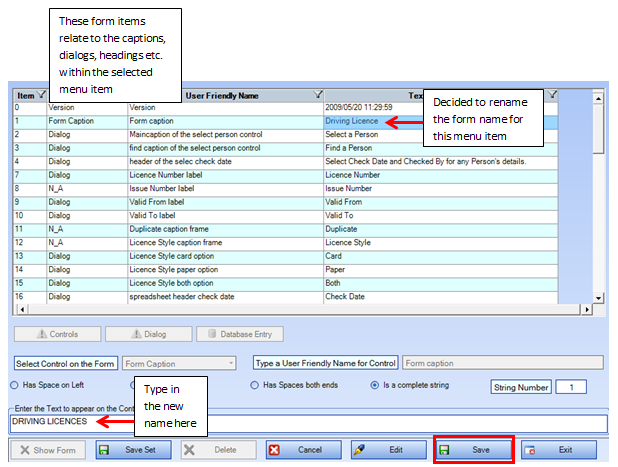
5. Highlight the item that requires re-naming and click the Edit button. When making changes the following points need to be noted:
Spaces - Some of the pre-defined text has been defined with spaces either before or after the string or both. In the table these spaces are denoted by stars ***. You will not see these stars in the text edit box but they are identified on the settings below the table. The length of the string is also stated here.

New Lines - In the text box new lines are entered by pressing the Enter key on the keyboard. Any New Line entry will by carried over to the display of this text on screen.
Type in the new name in the text box at the bottom of the page and click Save.
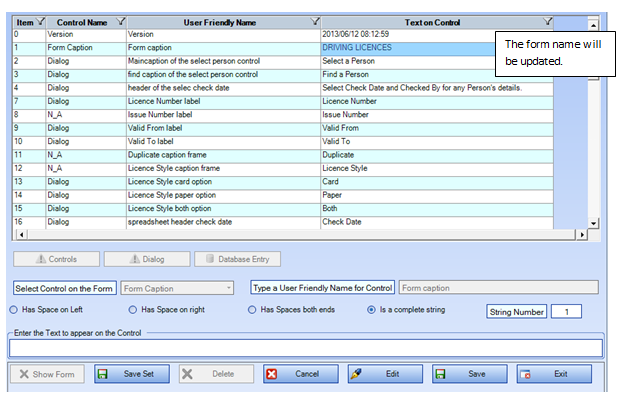
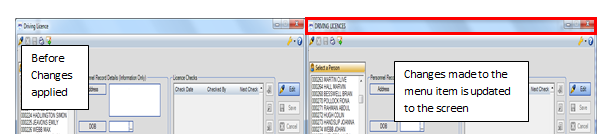
6. Continue making any other changes that are required and once all these have been made click the Save Set button. At the message click Yes to save the changes. The changes will be updated to the relevant screen.